4 weeks of production!

Hello again! I have been quite for about 4 weeks now. This is because Ii have been too busy with the project. I have decided to merge 4 weeks of blog posts into one long one. I have split the post in to 3 parts. Each part is a key thing I have been working on.

Starting from the start again

We were having a lot of trouble making the back part of our pods (pods will be called Beast in the rest of the text) look interesting for the player. We had forgotten that this is what the player will be looking at most of the time and that it has to look interesting and nice. We had been going on and off with different ideas for the beast that I was working on, but nothing was looking good. We decided to meet with our graphic mentors on Wednesday to see what advice we could get from them. They advise us to make thumbnails and silhouette designs from scratch to see if we could come up with a better design of the beasts.

Me and Seamus sat down and started design different beast by pasting, moving and scaling different parts from other things we thought look interesting as well as drawing our own designs. We decided that we were to make at least 5 designs each, and that on Monday we would choose witch beast/s we were going to be using.

On Monday we had around 16 designs and asked people to vote on the beasts they liked the most and why they liked them. We asked other groups, our group and our mentors. After the voting we were left with 6 beasts. We then sat in-group and decided witch two would not make it to the final. We wanted to have 4 designs because we were planning on having 4 different beasts for the final version of the game.

When we had our 4 beasts we sat and decided which once we were going to model and get into the game first, I chose the one I thought would look nice and that I wanted to model and Seamus choose the one he wanted to. Seamus then sat down and started drawing a turn-around that I could use. While he was doing this I had nothing I could work on, but to not waste any time I made a silo that could be used in the game environment while waiting for the turn-around. The turn-around took much longer that planed and our goal to try to have at least one finished beast for the alpha didn’t work. I tried to sit up the night before to get it done but I was too tired and didn’t get it going, so we had to use the old placeholder that I had done before.

The beast!

After failing the deadline of having a finished beast for the alpha we knew that to be able to get things done we had to crunch out the graphic assets.  To be able to work longer hours, I and Seamus asked if we could work at home witch the lead designer said was fine.

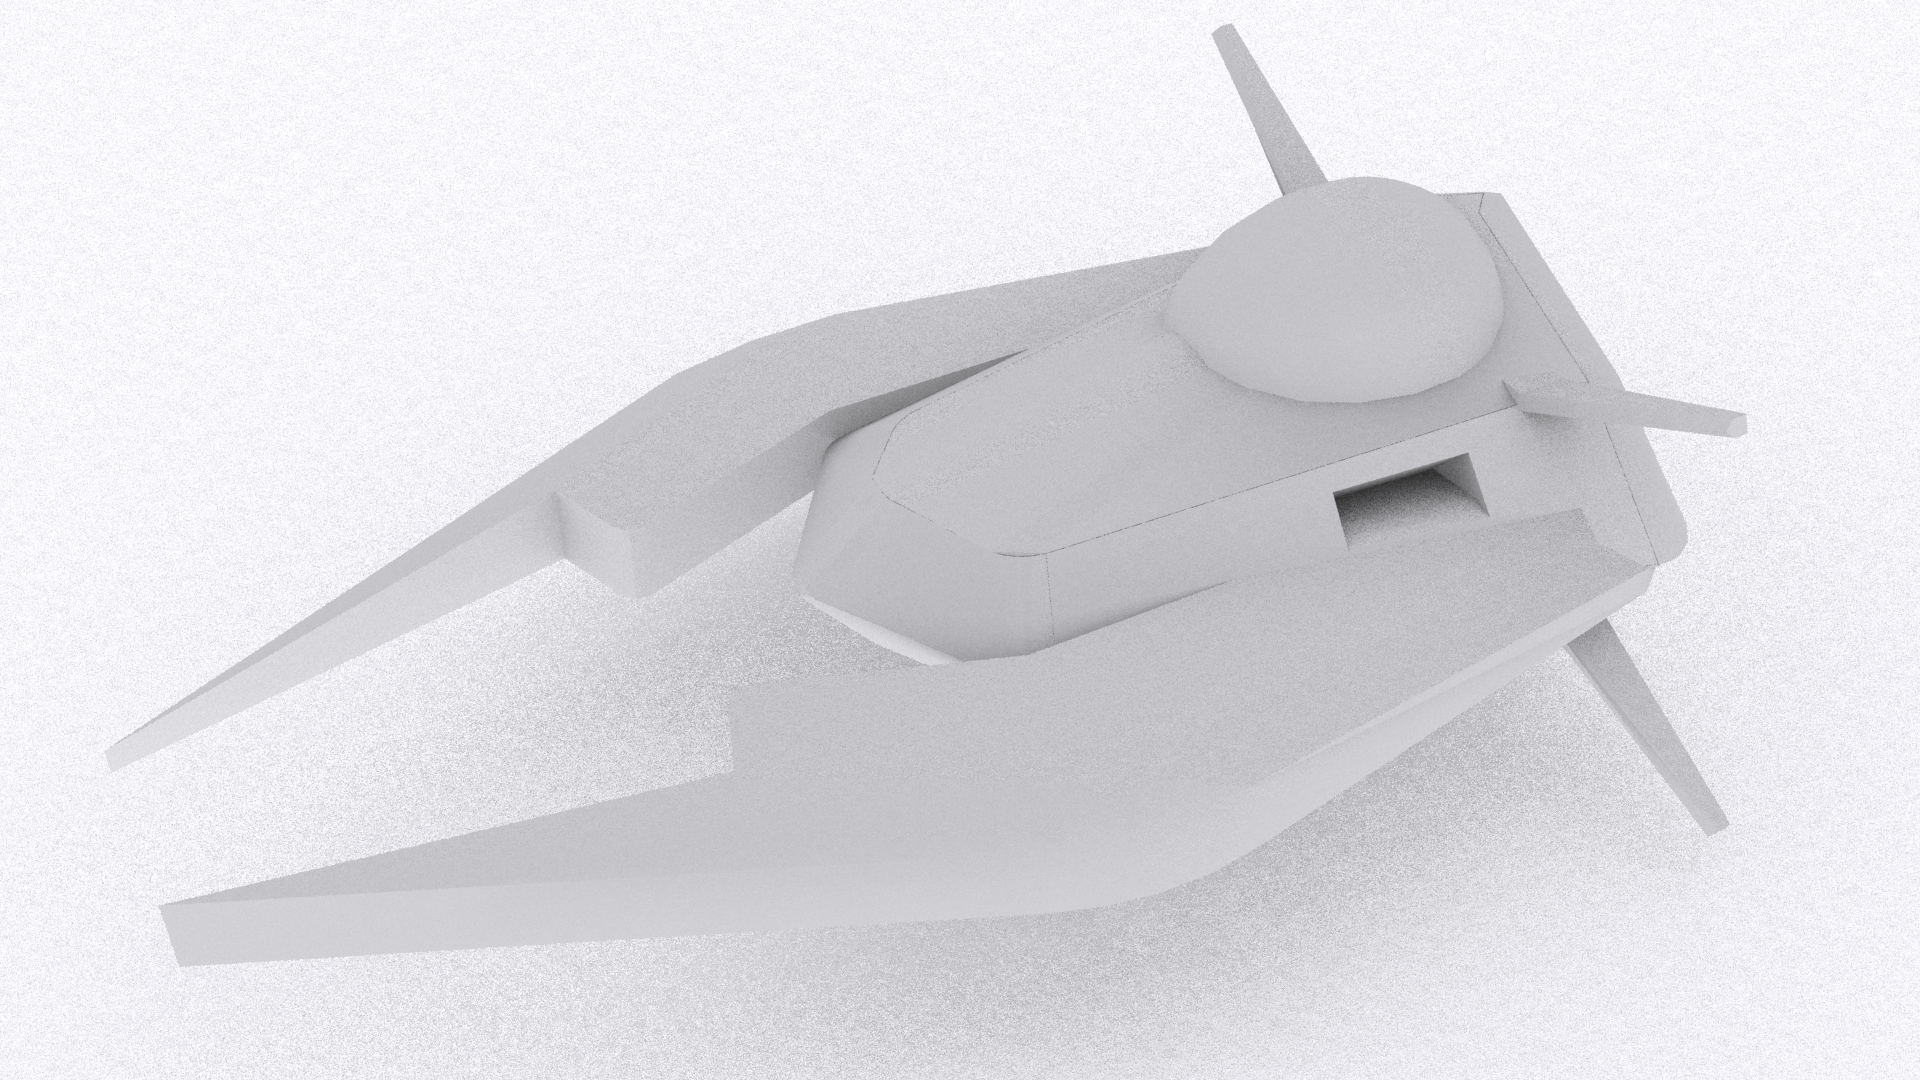
I started working on a simple high poly of the body of the beast from the turn-around that I got from Seamus and pasted in the two different engines I had done from earlier designs of beast. I had a working high poly rather fast and started on the low poly. This process was rather straight forwards and I kept working on it. The baking went rather well except that the high poly didn’t have that much information because I modeled it so we could add details to it later for polishing.

I then started to texture the beast and used Unreal to see how the texture was looking on the model while doing the texture. I used unreal because unreal supports PSD files (Photoshop document) so it would update the texture with a mouse click. I used a metal texture as a base and then added a color that would be the personal color of the beast; in this case it was blue. I then added dirt to the texture and patches of rust. I made the rust by picking colors from a rust picture I had taken online and drawing it onto my texture.

We decided that we would only use one beast for the build for GGC. We simple did not think we had time enough to make 4 unique models. We decided that we would do different textures for the beast model we had.

The last thing I did on the texture was to add a sticker at the back (the part the player would see when playing) which would give the beast texture more personality. I then copied the texture, change the color to orange and changed the sticker and we now had two different beast that player 1 and 2 could use.

To the Beta we go

After working home and getting a few keys things done me and Seamus decided with our lead designer that we should have a meeting and make a priority list of things that the lead designer wanted to see on the beta on Friday (this was on Monday). We made the list and we started working on different things, the things I was going to work on was the finish line as well as recharge plates.

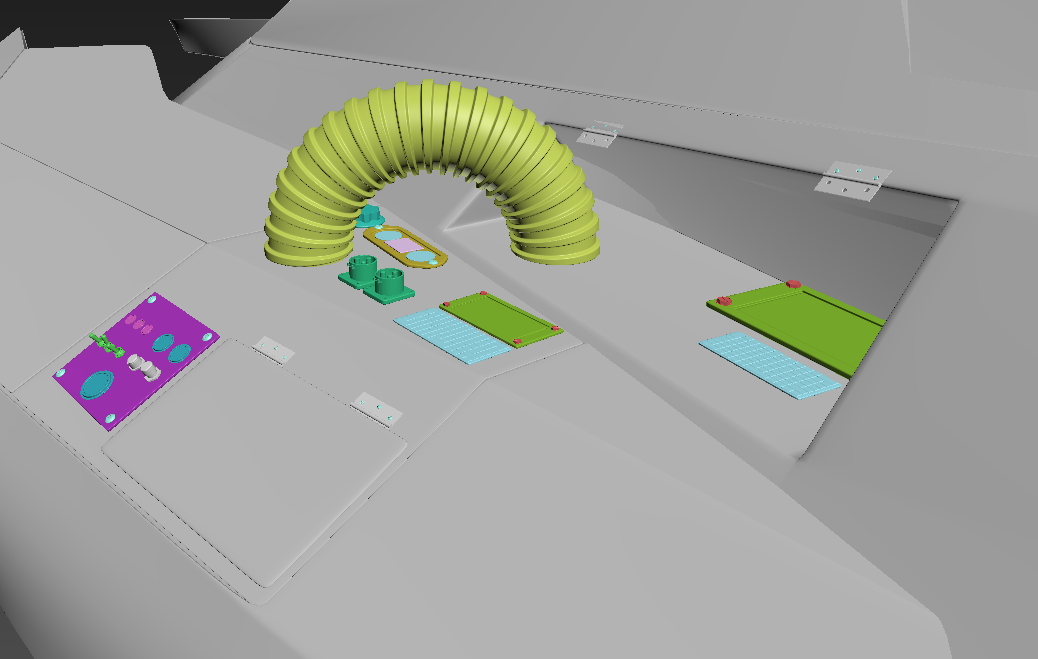
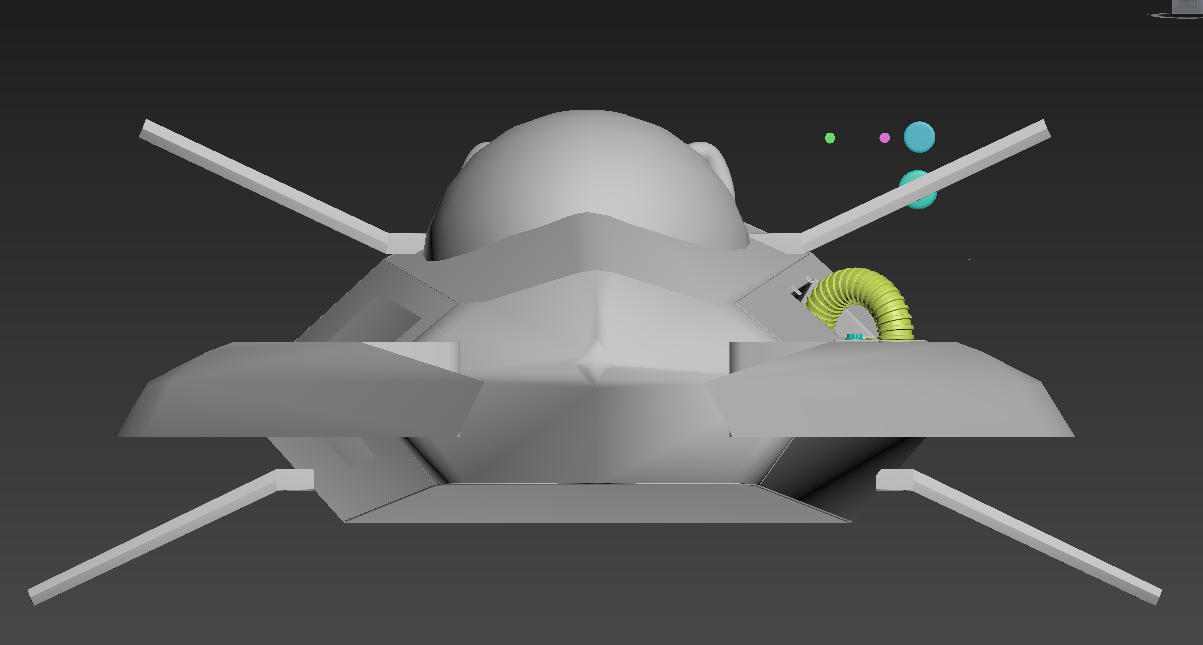
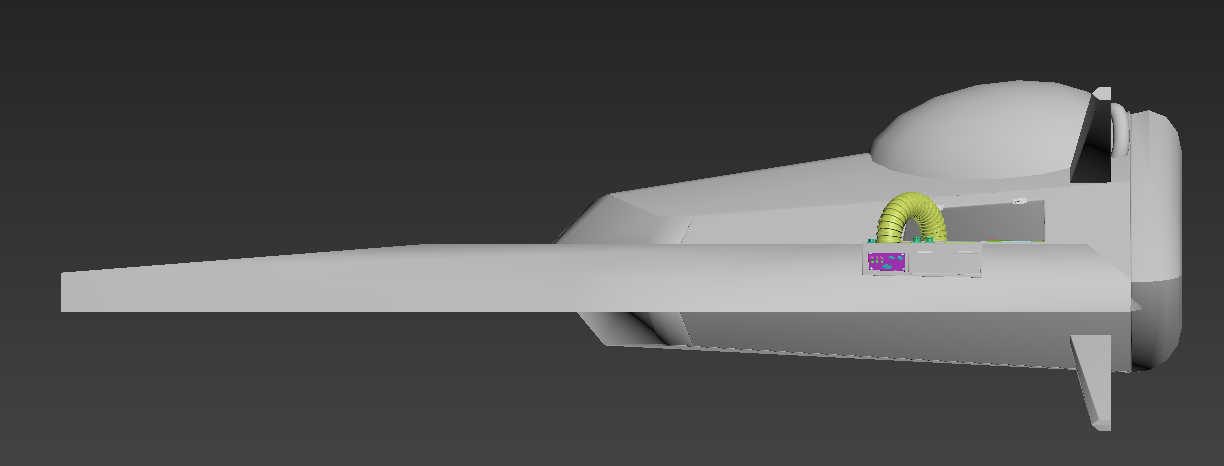
I had an idea for the recharge plates; my idea was to have engines that would have some sort of box on it that would project a hologram. I took the engines I had, made a plane that would be the hologram and put them in a scene where I had the track walls to measure how long the hologram was going to work with the walls, I quickly noticed that having the engines would not look good or make sence because players would drive into them. I took away the engines and worked on a box that would be placed on the walls and project the hologram. I made a quick High poly with pasting on buttons and different things I had from other projects and baked everything out.

Then I started working on the shader for the actualy hologram. I found a guide witch I followed and added my own things so it would be better for our game. This took a long time because I had never worked in shader forge (shader asset for unity) before and had to learn while doing it. After a day job I had something that we liked.

I then started working on the recharger platforms that would recharge the energie the players use for boost and life. The lead designer had a design that he had drawn up so the modeling part was quick and easy. I then started to texture it witch gave me some headech because I didn’t really know what to do. I wanted to make it metal and rust as our other things but still needed to indicate that this is something positive and that players should drive onto it. I tried to make the actual recharge things glow but could get it done in shader forge. My solution was to make a cylinder with its own shader that looked close to the hologram so the player would understand that something is projecting out of the recharger.

Bild till bloggenallt

Here is a picture of the different things I have been working on in Unity

That is what I have been doing for the past 4 weeks more or less. Sorry for the long post intill next time bye bye!

Posted in Uncategorized | Tagged , , , , , , , , , , , , , , , , , , , , | Leave a comment

Week two of BGP and Burning Steel

Hello again! And welcome to week two of the production of Burning Steel (aka Project Steel).

For this week have been working on 2 main things. I have been working on a style guide and the High Poly of the first pod.

The style guide is what the name implies. It is a guide to help the artist to keep the same style between each other and throughout the game. On Monday I did a rather fast version of the style guide that we could show the artist mentors our style guide. It had a lot of holes and things that had to be fixed. The first thing was that all the artist in our group had to understand and know what everything in the guide represented and meant.  The second thing was that I had not done a guide for the environment due to lack of time.

So on Tuesday I sat down with the other artist (Seamus) and started to rework the Style guide. We talk about what key thing we had to think about when designing and executing the art artifacts needed for the game.  We broke it down to three different key areas. The first being the overall style for the game, then the pods style and lastly the environment.

Burning Steel Styleguide overallBurning Steel Styleguide podsBurning Steel Styleguide Enviroment

After we had sat down we asked the lead designer if this was what he had versioned and he gave us the go. They key thing here was that both me and Seamus were on the same page on what everything in the style guide meant. We wanted the style guide not to be too strict to leave room for us to design what we would think fit but still have enough “rules” so that the different artifacts would not look like they belonged to two different games.

You can read and look at our style Guides further up in the post.

The second thing I worked on this week was the highpoly of the first pod. The first thing I did was to change back into 3D studio max. I did this because there were a lot of things that needed to be done that I could do in 3d studio max but had trouble doing in Modo. This helped my workflow a lot. Instead of searching for solutions to easy problems that I could not always find a solution for in Modo I could just fix it right away in 3d studio max.

I worked on a part control panel on the left wing. I also wanted to add things that showed that the driver had to high wire his left wing because it had stopped working somehow. I drew out some fast ideas on Postits notes and then started modeling different parts. I started with the fast sketch so I had a overall understanding on where I wanted to go with the design, even though it changed a lot while I was modeling the different things for the control board.

20150417_185044

Left Wing panel

I had felt some sort of dislike about the model for a while but I could not put my finger on what. I noticed it mostly that my workflow was slower then normal and that I could sometimes look at the model and feel like something was missing or not wrong with it. I asked Seamus what he thought and even if I should change the model and start from scratch because it was not doing it for us.

We had a meeting and try to figure out what was wrong with it and what we could do to change it.

The first thing we agreed on that it was a bit too bulky in its design though we also agree that it could work with that this pods was the one that would have the most Health point and would not be destroyed as easily as the other pods.

When then tried to critical asses every part of the pod to try to grasp what the problem was. Nearly every part needed some sort of changing in its design; the only thing that kept it overall design was the main body of the pod.

We sat down to gather and changed things on the model while discussing what we could do to make it better. One thing that I thought it missed was this big engines that helps with the feeling of the pod being home built and that it goes fast, one of my first designs of the pod was with big yet engines but it was scrap due to that it looked too much like an air vehicles. So I tried a design now where the engiens were built into the wings and Seamus liked it and we went for it.

Another thing that gave us problem was that Seamus wanted to make the Main body longer and closer to the tip of the wings. There was one problem with this, it look much better though it lost the feeling of being home built. We asked our producer and lead designer for feedback, and they liked the original more but both I and Seamus agree that the longer one looked “better” more like a nice sleek spaceship but that it lost its broken and homebuilt feeling. So we compromised we brought it forward not as fast as before but still forward.

After the changes to the pod we both thought it looked better and I started to get into the workflow easier though this was short-lived.

Front before Side before

This is the before pictures

Side After Front After

This is how it looks now after the changes, The engines are place holder at the moment.

I started working on changing the spoilers because they looked to much like just metal pieces that had been put on the ship, this did help with the feeling of home built but still made to little sense to keep it.

I tried 3 different designs on what I could change the spoiler to. And some fast sketches of ideas on paper,  I decided on that I would try to rework the once I already had.

The problem I had with the spoilers was due to have a little area to work on. And that it needed the spoilers to give the pod more character. I have still not fixed the spoilers so that I am happy with them though I think after a day of I might be able to look at them with fresh eyes.

Sorry for the long post but thanks for reading!

Posted in Uncategorized | Tagged , , , , , , , , , , , , , , , , | Leave a comment

First Week of Project Steel

Hello! and welcome back to my blog! For around 10 weeks I will be posting a weekly blog post talking about what have been working on during that week for the development process of the game Project Steel (WIP).  My role in the project is Lead 3d artist.

This week was our first real week of production. We got a greenlight on Monday and got our office on Tuesday. Most of the time on Tuesday went to fixing our office space as well as getting the screen and things that we needed from Finn.

Then on Wednesday we started the project for real. We had a more serious scrum meeting where we plan what people were going to be working on during the week.

I sat down with the other 3d artist in the group and tried to plan what had to be done and what deadlines each thing was going to have. We plan as long as to the Alpha witch is on the 28th of April.

The next step was to start working on what had to be done this week.

I was going to start working on the first pod or vehicle that was going to be used in the first playable version of the game. I had to draw some sort of concept witch then had to be approved by the Game designer. Then make a Highpoly model witch would be used for baking out textures for the model witch would be used in the game at the end.

My first thought about how to get the concept done was to make some sort of fast sketch model in 3d done witch I could show the game designer called Cheese. I thought that this way might have been the fastest and easiest because I don’t have that much of skill in drawing. This turned out not work that well not only because it did take longer time then if I would have tried drawing at least something out, but also because I had didn’t have anything to go on, I had no real idea or feeling of what Cheese wanted the pods to look like. What I did then was to push Cheese in to making some sort of Mood board witch I could follow to get some sort of pod design.

While he was working on getting a mood board for the design of the pods me and the other 3d artist named Seamus went and gather pictures of different spaceships, cars, race cars, airplanes ex that we could use to help us in the design process.

Finaly we got the moodboard and we started to get a broad understanding of what Cheese wanted the pods to look like. So I sat down in Photoshop and tried to get some sort of sketch down on how the first pod was going to look.

This is the final conecpt sketch of the pods overall look.

I drew 4 different ideas on the overall form of the pods and sent them to Cheese to get feedback and witch one he liked the most. He liked the 4th one the most but asked about a bit more details on how the pod was going to look. I told him I was going to add some pipes and cords and some broken pieces of metal so that it became more like the idea he had in his head. He liked it and I moved on to the next step. The highpoly

Now when I had the overall form of the pod and a somewhat idea on how I wanted the pod to look so I started on the Highpoly. I decided to work in a new program witch I had not worked a lot in before but from what I had tried of it and seen it was a good program for hard surface highpoly modeling. I stayed late in the office to try to understand the program better so I could start working in it the next day. The program is working rather well and I quickly understood how to work in it though I still have a hard time to find fixes of issues that I would know how to fix in another 3d program. It didn’t take long before I had the base of the highpoly ready and then could start working on more details like cords, broken metal pieces, and so on. I ran into more problem here witch was that I was not 100% sure what I wanted to do with the details. This was mostly because I did not have a solid concept witch I was following.

Sketch Pod 1 details

this is how the model looked before i went into Photoshop to sketch over it.

After some wasted time of trying and failing and not really getting anywhere with how the detailing was supposed to be, I rendered out a picture of the pod and sketched over it on how I wanted the details to be. This was also the end of the week and on Monday I plan on getting the details done so I can start working on the low poly model.

I hope that I explain the process and the thought process well and if you have any questions or anything you are wondering about please feel free to comment and I will try to give you and answer!

Regards Simon Strandh

Posted in Uncategorized | Tagged , , , , , , , , , , , , , , | Leave a comment

Assignment 3 update Finish project!

Assignment 3 update Finish project!

This is how my model turned out in the end!

Minion finished

I haven’t had time to start using UDK yet so I am still using Unity and I hope that works fine

This is how the texture maps looks as well as the how I packed the UVs

Diffuse_Map

Specular_map

Normal_map_NRM2uvs

Posted in 5SD045 | Tagged | Leave a comment

Week 8 3D blog!

Week 8 3D blog!

I was sadly sick during the lesson where went through how to scan your face and to actually do it so i was thinking of writing about my general opinion about 3D scanning in general as i got some knowledge about it thanks to a course I went last semester.

So there will be two different types of scanning that I will be talking about in this blog post. The first way is scanning with the help of photos and the second with the help of laser.

Scanning with the help of photos

The positive things with scanning with photos are that you could easily scan things while on the move. All you need is to have a camera with you all time if this is a very good digital camera or if it is your cell-phone you will be able to take pictures to be able to reconstruct the object in a 3D scanning program. This in my opinion the best thing about the 3D photo scanning technique. I was in Germany this summer and took picture in 360 (or as well as I could) so now I could go into my picture library whenever I am in need of sculpting that I could easily reconstruct into a 3D object and then model or bake with it, you could also just use it for the texture witch can help a lot when modeling low poly models.

The things that are negative with photo scanning is the resolution and that amount of photos that are need, as well as that sometimes it is very hard to cover big objects and areas. The resolution problem is that it doesn’t feel the depth of really detailed places if you do not take a close up witch might give you trouble with setting up the photos before creating the 3D object from the pictures. With the photos if you want a rather well resolution you will have to take a lot of pictures to get that kind of resolution. Covering a vast or big area is not going to work with photos the first problem you are going to come up against is the large amount of photos that you will be able to have and the time it will take you to go around and take pictures of everything and when setting up the photos in the 3D construction program is going to be long and painful firstly because of the amount of pictures and that you might have to manually lay out where they are supposed to be and this will take time.

Scanning with lasers

The positive things with scanning with laser are that you don’t really have to do much while using it. All you need to do is to set up the machine and then let it do its work. You can also get insanely good resolution with it because it sends out lasers to calculate the depth. So you can cover great space without you doing a lot of work yourself.

The negative things is that it cost a freakily high amount of money to get your hands on a laser scanner that you can use for scanning objects for 3D objects. It is also not that easy to scanning things without planning ahead because the machine that you will be using for the scanning is rather big and clunky so you can’t really take it with you all the time.

So this is my input of 3D scanning and I am not sure if this counts as a blog report but I don’t really mind!

Posted in 5SD045 | Tagged | Leave a comment

Assignment 3 update!

Assignment 3 update!

This is how my model looks like now with the body edge flow.

Minion edgflow

Posted in 5SD045 | Tagged | Leave a comment

Week 7 3D blog!

Week 7 3D blog!

This week we have been going over the human anatomy with our 2d drawing of it and how the muscles work and where they are placed. I sadly do not have any 2D drawings because nothing that I have done has any skin showing sadly. This is mostly because I don’t have that much skill in 2D and I can’t really draw the anatomy so the lesson was still nice because I got some insight in how it works on top of what I already knew though I still think I can’t draw it. We also sat down during class and drew the anatomy on top of sculptures and that was easier for me though it was not perfect but it helped me to understand how to do it in 3D though I never think I will be able to draw it with free hand.

I did not get that much feedback from class mates and this is my own fault for not having anything to show though I did show what I had done ( witch didn’t have any muscle or skin showing or clothes that where loosely or hanging). The feedback I got was to just try to draw more and get better at 2D in general though I did get some positive feedback on the assignment when we drew on top of the sculptures. My main problem is that I have come to the terms that it is going to be really hard for me to get better at 2D so all my focus is on 3D because it is what I want to work with in the future and what I have been doing for the past 4 years.

If I should try to make a plan on how to get better with drawing the anatomy of humans it would be to get back to the basics of 2D art and start there and just practice a lot everyday but I don’t really have time for that. One thing that would probably help me the most would be to download different pictures and drew the anatomy on it makes one or two of this everyday with different kind of humanoids. This will help me more in the understanding of it and being able to apply it to my 3D. After a while I might even get better at 2D as well! After 2 months I might try to make more drew on more pictures than 2 each day as well as go back and redraw on top of models I have already done to see how far I have come. Now I will go onto more non looking humanoids and creature as well as animals to start to understand them better and so on. Then after 6 months I should have a much better understanding on how the muscle works on animals and different kind of creatures and will be able to use it well when I am modeling different characters, I might even be able to drew them as well for my own characters!

Posted in 5SD045 | Tagged | 1 Comment

Part 3 The beginning of assignment 3

Part 3

The beginning of assignment 3

I have already gone over a bit about the concept that I made for Seamus Newman to create durying assignment 3 but now I will go over what I am supposed to be making and the concept made by Alexander Westerdahl.

I am going to link the text that I was given about the character bio but first I am going to write a summary to you people who don’t want to read through all of it.

The character is a Minion from the movies Despicable Me and its name is simply Minion. Minion works for the main character of the movies Gru. Minion is an assistant to the lead engenderer of Gru’s minions. He is not the smartest minion but he will get the job done. He has a rounded cylinder like body with tiny feet and long arms considering the size of their bodies.

The Bio:

Character concept.

  • Minion 372
  • Name: Minion
  • Gender:  Unknown
  • Age: Unknown,  average 30 years old
  • Physical: weak, healthy, strenght in numbers
  • Movement: wobbling, jumping on two legs
  • Appearance: Spherical, compact, bouncy
  • Intelligence: Medium
  • Religion: Gru
  • History: Unknown
  • Psychology: exentric, humorous, loyal
  • Language: Banana Language


Intelligence

Even though they may not be the brightest, they make up for it in effort and the fact that you can always trust them. There are however, some things that minions do less well. One of those things are abstaining from practical jokes, in some cases minions may end up failing their task at hand due to excessive joking and laughing.

Psychology

Minions in general have a bright sense of humor and are always happy and joyful.

Appearance

Minions have a round cylinder like body with tiny feet and long arms considering the size of their bodies.

Religion / Culture

Minions have a reputation of being extremely loyal towards their employer / master.
This is also where there beliefs are, they live for the sole purpose of serving their master.

My minion

He specializes in repairs and general engineering, assisting one of Gru’s lead engineering employees in his work. His primary tools feature a drill and a wrench. Even though he may not be the brightest, he makes up for it in dedication and loyalty.
Props and clothing:

Glasses.
Wrench.
Power Drill.
Pants
Gloves.
Shoes.

The visual style is cartoon and has a lot of bright colors with not much detail on the body except the pants. Because I have had problems with the texture before because I have trouble with 2D I will have to try to show it on the pants while the skin of the character is just one color of yellow.

I don’t know anything about the game or the game world except what I think I know from the movies and the role of the character. But I don’t think it is that much needed because most Minions look the same and I have gotten concept art of how this character is supposed to look with the goggles and pants. If needed I will try to add some sort of wrench or something that I got in the bio of things I could add though I think it will not count for this assignment because it is a prop and it will have its own poly count.

One of the problems that I need to look into is that when we have lectures we will be going through character that are more human looking in anatomy and shape. I will have to take what we learn and try to apply it to this character that still is an organic character but still not really a humanoid. This hopefully will not be a problem though I want to make it as much as our teacher wants the edge flow to be like so I will have to ask her while I model to quickly find problems and solve them fast.

For me this character is rather boring in its sense that there is not a lot of details and things going on but something being boring is not an excuse to do a bad job or not at all. So this will be good practice to model something that I have no creative drive to do. The positive thing though is that the character is rather simple except for the problem that I have stated before is the post. So in this assignment the simplicity might be the fall for me in more than one way. The first being is that I don’t get the knowledge from the lectures that are needed for this model and my drive being low so that I will get stuck and not work as efficient as I can.

Posted in 5SD045 | Tagged | Leave a comment

Party 2 of week 6

Party 2

This is how my dagger is looking with its finished texture

dagger

Normal texture

Diffuse texture

Normal texture_NRM

The problem I had with the texturing was that I could not find good and accurate textures for the silver materials on the handle’s and the protective part of the dagger. So what I had to do was to do take a ring that had some metal engravings on it and use that. I am not 100% happy because it does not look like the dagger is supposed to looks like but still happy with the outcome with the textures that I could find.

Posted in 5SD045 | Tagged | Leave a comment

Week 6 Blog report

I have made a character for Seamus Newman that he will be working on for the next 5-4 months. The character is a Jawa from the star wars universe. I am going to go in a bit of detail of the world that my character lives in and the game world.

The character lives in the Star Wars universe as I stated before. The time era is around the end of the Rise of the empire era and the begging of the Rebellion era. For those that are not that knowing about the Star wars universe or even its eras I will explain that for you as well though you will have to have seen the movies at least to be able to understand what I am talking about.

The time period that my character lives and strives in is in between the movies Revenge of the Sith and A New Hope. The story in the game will be focused mostly on the era around the movies A New Hope, Empire Strikes back and Return of the Jedi ( the rebellion era starts at A New Hope and ends at the end of Return of the Jedi).

I have two ideas about what the roll of the character is and it also makes up two kind of different games.

First idea was that the character is the main character so you play as Wimateeka the Jawa who is a bounty hunter. The story was about the Jawa who has taken about the bounty hunting proffestion insteed of the normal work of scavenging that the Jawas normal work with. The world then would be a world of criminals and people that Wimateeka need to kill or capture. The game will jump from the normal crime infested planets as Tatooine (a desesrt planet with the criminal syndicate of the huts rule, on Tatooine the population is made up of all kinds of aliens) Nar Shaddaa ( a city planet that is controlled by the huts the population is made of all kinds of aliens though after the Galactic empire came in power aliens have become followed by the empire because they are not humans) and Coruscant ( a city planet and the capital of the Galactic empire, Is controlled by the Galactic Empire though there are still a lot of crime syndicates still operating in the city/planet. The population is made of all kinds of aliens though after the Galactic empire came in power aliens have become followed by the empire because they are not humans).

The second Idea was that the Character (Wimateeka) is a companion for the main character that the player will play. Still being around the same worlds as stated before but the game would not be surrounding Tatooine’s dynes and non-populated areas as much as it would if Wimateeka would have been the main character.

That would be the games more or less or at least what I had thought about.

Because both games have a lot to do with crime that that is the society that surrounds the player, one aspect though that is added if the game would have been the first idea aswell as if the story would surround Wimateeka a lot is the culture of the Jawas. I will take what http://starwars.wikia.com/wiki has said about thier culture:

Jawas were a communal, compulsive scavenger species who spent most of their life devoted to scavenging the deserts of Tatooine in search of any scrap metal, droid or mechanical part left behind from millennia of star travel and technological advancement, where the dry climate of Tatooine preserved almost all debris. Most non-Jawas regarded the Jawas as scavengers and thieves, a description that most Jawas actually found pleasing.

The Jawa’s unofficial motto was not to look for uses in a salvaged item, but rather to imagine someone else who might find a use for it.[10] And this was evidenced in their endless search for wares with which to trade with almost any being Jawas encountered. They had a kind of instinctive feel for machinery and electronics, notorious for knowing how to get a piece of equipment functioning just well enough to sell.

The thing with Wimateeka is that he has abandoned most of his culture when he set out to become a bounty hunter after his tribe was killed.

Concept art

This is the concept picture that i found and tweaked for this assignment I do not own this picture at all just so people know! =)

So this is the concept of the world abit of character and the story/game that I have comed up with.

Posted in 5SD045 | Tagged , , , | 1 Comment